-
Teachable Machine을 사용한 동작 인식 결과 LCD에 출력하기카테고리 없음 2023. 10. 16. 16:05
Teachable machine을 이용한 포즈를 인식하는 모델을 P5.js와 아두이노를 통해
LCD패널에 출력하는 프로그램을 작성해보겠습니다.
시작하기 전 필요한 것들
1. Node.js
2. Phython 3.11
3. P5.serialserver 코드
(https://github.com/p5-serial/p5.serialserver)
GitHub - p5-serial/p5.serialserver: Server for use with p5.serialport
Server for use with p5.serialport. Contribute to p5-serial/p5.serialserver development by creating an account on GitHub.
github.com
Teachable Machine 모델 학습

Teachable Machine 포즈로 RIGHT 와 LEFT를 학습시켜 업로드를 해줍니다.
모델 내보내기를 하여 만든 모델의 링크를 복사하면 됩니다.
P5.js 코드 작성
https://editor.p5js.org/dano/sketches/JyMm6GiEk
p5.js Web Editor
editor.p5js.org
구글에 p5.js teachable machine pose 를 검색하면 위 링크를 찾을 수 있는데
Teachable Machine의 포즈 모델을 P5.js에 연결 할 수 있는 코드입니다.
index.html 코드
<html>

<head>
  <meta charset="UTF-8">
  <title>Poses classifier</title>

  <script src="https://cdn.jsdelivr.net/npm/@tensorflow/tfjs@1.3.1/dist/tf.min.js"></script>
  <script src="https://cdn.jsdelivr.net/npm/@teachablemachine/pose@0.8/dist/teachablemachine-pose.min.js"></script>
  <script src="https://cdnjs.cloudflare.com/ajax/libs/p5.js/1.1.9/p5.min.js"></script>
  <script src="https://cdnjs.cloudflare.com/ajax/libs/p5.js/1.1.9/addons/p5.dom.min.js"></script>
  /*
  <script src="https://cdn.jsdelivr.net/npm/p5.serialserver@latest/lib/p5.serialport.js"></script>
  <link rel="stylesheet" type="text/css" href="style.css">
  <meta charset="utf-8" />
  */
    // 기존 html 코드에 serialserver을 연결하기 위해 추가한 코드
</head>

<style>
  .bold-text {
    font-size: 20px;
    font-weight: bold;
  }
</style>

<body>

  <script src="sketch.js"></script>
</body>

</html>
sketch.js 코드
const modelURL = 'https://teachablemachine.withgoogle.com/models/JnZN-kNyZ/';
// Teachable Machine 모델의 URL

// the json file (model topology) has a reference to the bin file (model weights)
const checkpointURL = modelURL + "model.json";
// JSON 파일의 URL을 정의

// the metadata json file contains the text labels of your model and additional information
const metadataURL = modelURL + "metadata.json";
// 모델의 텍스트 라벨 및 JSON 파일의 URL을 정의합니다.

const flip = true; // 웹캠 영상을 뒤집을지 여부

// 각종 변수 선언
let model;
let totalClasses;
let myCanvas;

let classification = "None Yet";
let probability = "100";
let poser;
let video;
let serial;

// 모델을 불러오는 함수
async function load() {
  model = await tmPose.load(checkpointURL, metadataURL);
  totalClasses = model.getTotalClasses();
  console.log("Number of classes, ", totalClasses);
}

// p5.js 설정 함수
async function setup() {
  myCanvas = createCanvas(400, 400); // 캔버스 생성
  videoCanvas = createCanvas(320, 240); // 다른 캔버스 생성

  await load(); // 모델을 불러오기
  video = createCapture(VIDEO, videoReady); // 웹캠 영상을 캡처하도록 설정
  video.size(320, 240); // 영상 크기 설정
  video.hide(); // 영상을 숨기기
  serial = new p5.SerialPort();
  serial.open("COM5"); // 시리얼 포트를 열고 설정
}

// p5.js 그리기 함수
function draw() {
  background(255); // 배경을 흰색으로 지우기
  if (video) image(video, 0, 0); // 웹캠 영상을 그리기
  fill(255, 0, 0); // 텍스트 색상 설정
  textSize(18); // 텍스트 크기 설정
  text("Result: " + classification, 10, 40); // 텍스트 표시

  text("Probability: " + probability, 10, 20); // 텍스트 표시

  textSize(8);
  if (poser) {
    for (var i = 0; i < poser.length; i++) {
      let x = poser[i].position.x;
      let y = poser[i].position.y;
      ellipse(x, y, 5, 5);.
      text(poser[i].part, x + 4, y);
    }
  }
}

// 웹캠 영상이 준비되면 호출되는 함수
function videoReady() {
  console.log("Video Ready");
  predict();
}

async function predict() {
  // Prediction #1: run input through posenet
  // predict can take in an image, video or canvas html element
  const flipHorizontal = false;
  const {
    pose,
    posenetOutput
  } = await model.estimatePose(
    video.elt, //webcam.canvas,
    flipHorizontal
  );
  // Prediction 2: run input through teachable machine classification model
  const prediction = await model.predict(
    posenetOutput,
    flipHorizontal,
    totalClasses
  );

  // Sort prediction array by probability
  // So the first classname will have the highest probability
  const sortedPrediction = prediction.sort((a, b) => -a.probability + b.probability);

  //전역 변수에 저장
  classification = sortedPrediction[0].className;
  probability = sortedPrediction[0].probability.toFixed(2);

  if (pose) poser = pose.keypoints;

  predict();

  print(classification) // P5.js에 결과가 어떻게 나오는지 표시

  if (classification == "RIGHT") // 결과가 RIGHT라면 1을 serial 통신으로 아두이노에 전송
    serial.write(1);
  else
    serial.write(0); // 아니라면 0을 전송
}
기존 코드에서 html 부분에 sript 부분을 추가했으며 sketch.js에 시리얼 통신을 위한 코드와 right와 left일 때 결과값을 전송하는 코드를 통해 아두이노에 시리얼통신으로 데이터를 전송합니다.
아두이노 IDE 코드 작성
#include <LiquidCrystal_I2C.h> // LiquidCrystal_I2C.h 헤더파일

LiquidCrystal_I2C lcd(0x27,16,2); // 0x27의 주소, 16x2 문자열을 표시하는 LCD

void setup() {
  lcd.init(); // LCD 초기화
  lcd.backlight();
  Serial.begin(9600);
}

void loop() {
  if(Serial.available() > 0) { //시리얼 통신으로 결과 값을 받았을때
    byte data = (byte)Serial.read(); // 값을 data에 저장
    lcd.setCursor(0,0); // lcd의 출력하는 문자 위치의 시작점을 (0,0)으로 설정
    if (data==1)
      lcd.print("RIGHT"); // 시리얼 통신으로 받은 data가 1이면 RIGHT를 출력
    else
      lcd.print("LEFT "); // 아니라면, LEFT를 출력
  }
}
서버 연결
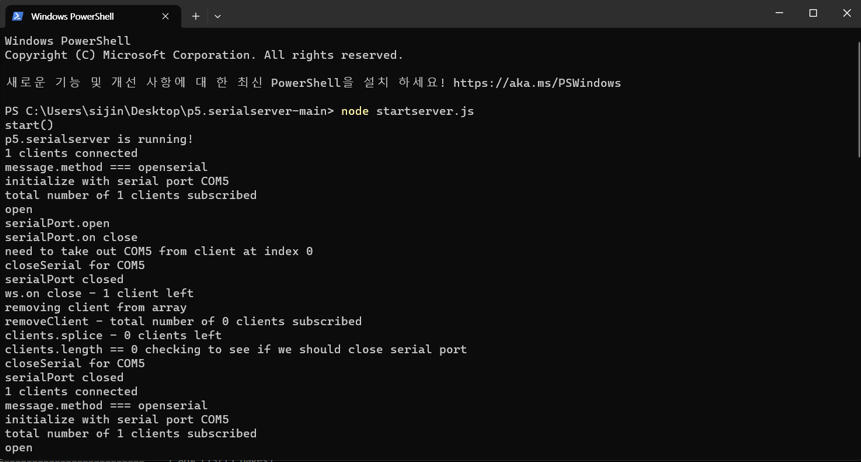
아까 깃허브에서 다운로드 받은 p5.serialserver-main을 열어 터미널을 열어주고 npm install,
node startserver.js를 입력하여 서버를 연결해줍니다.

이제 모든 준비가 되어 아두이노의 lcd 패널을 연결하고 코드를 작동시키면 됩니다.
작동 영상
lcd 패널에 출력하는 실제 작동 영상입니다.
